Karthik Tech Blogs
Segmentation data annotation cvat
In this article, I will walk you through the process of annotating images for instance segmentation using the cvat.org website.
Before we begin I will give you a brief introduction about instance segmentation. Segmentation of each instance of objects in the image is called instance segmentation. In the below dataset, the application was to segment each instance of bread hence instance segmentation is employed.
Let’s start with the annotation task. cvat annotation tool can be locally installed or used in a website based on the data. If it’s a private data, installing it in local and then annotating is preferred. Prebuilt docker images are available to use cvat in offline.
- cvat server -
docker pull openvino/cvat_server - cvat ui -
docker pull openvino/cvat_ui
In this tutorial we will use the cvat.org website to annotate our sample data.
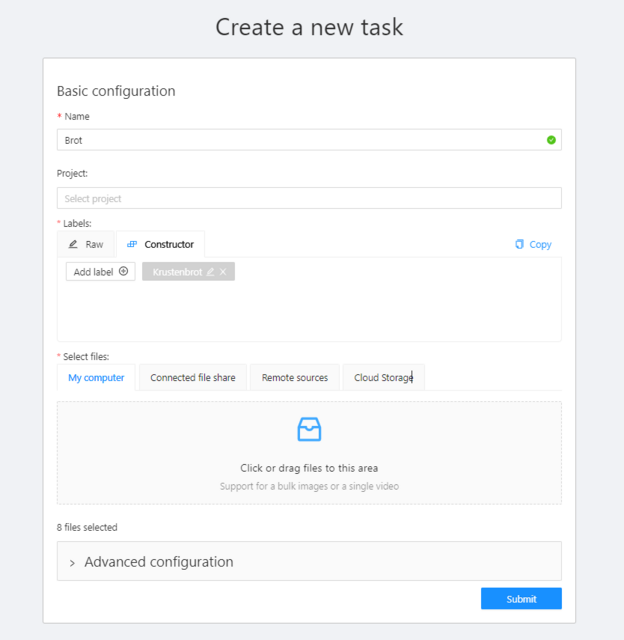
- First step is to create a task, give the Name, Label, upload the image data, then finally click on submit.
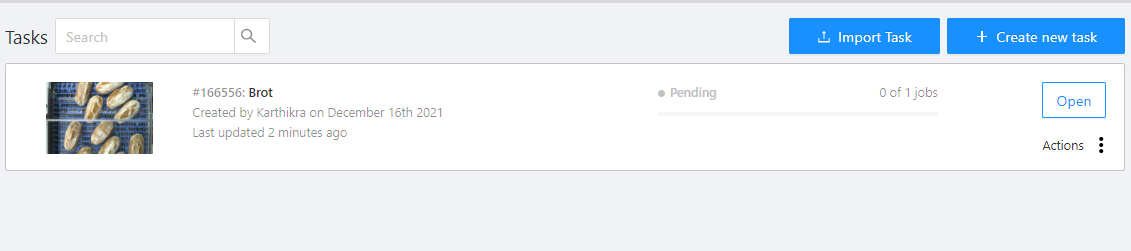
- Under the Tasks section, verify the task being generated for annotation. Click on open and start annotating.
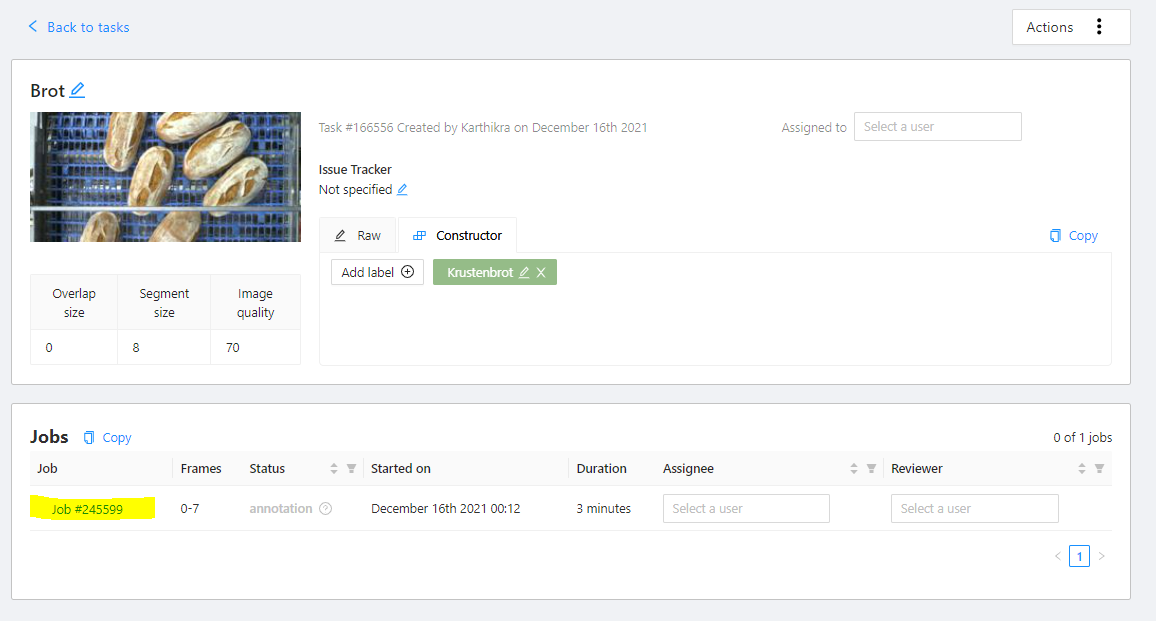
- Select the Assignee and Reviewer, this is an important step to export the data. In my case, I gave my name for Assignee and Reviewer, without mentioning it the data was not generated. Then click on the listed Job to start annotating.
- The annotation page looks like below. Here you must select the Appearance, Polygon for annotation.
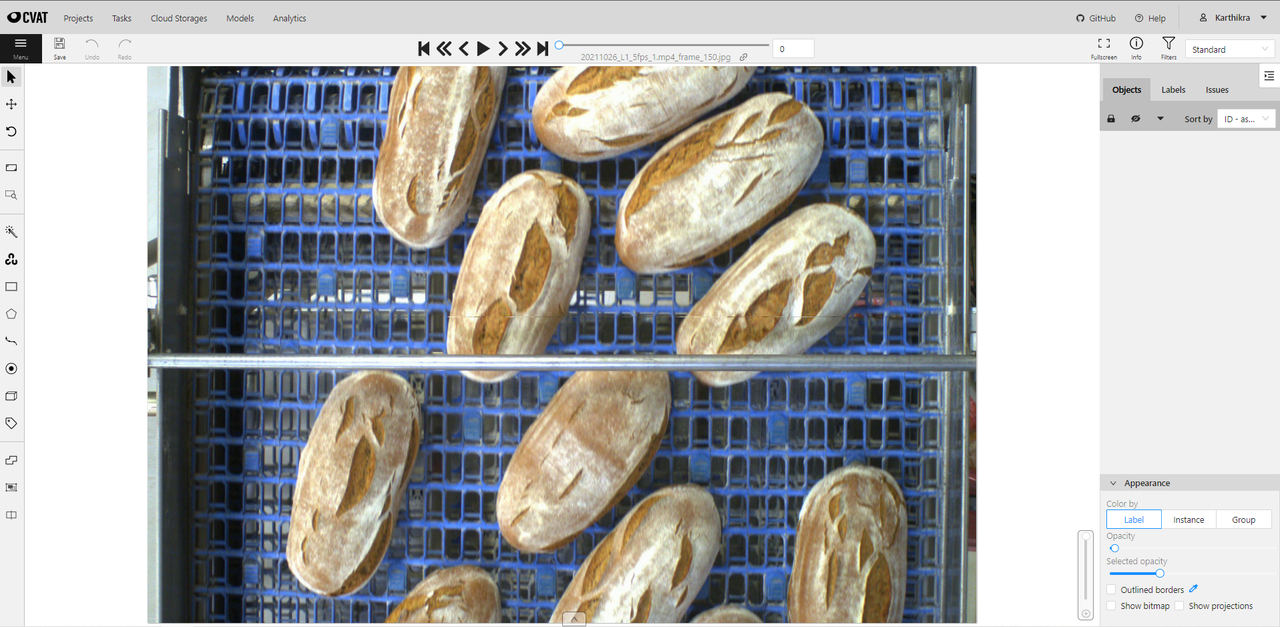
- Select Instance for instance segmentation and Polygon for drawing polygons for annotating the object instance. Shape option was convenient for me, but it depends on your comfort.
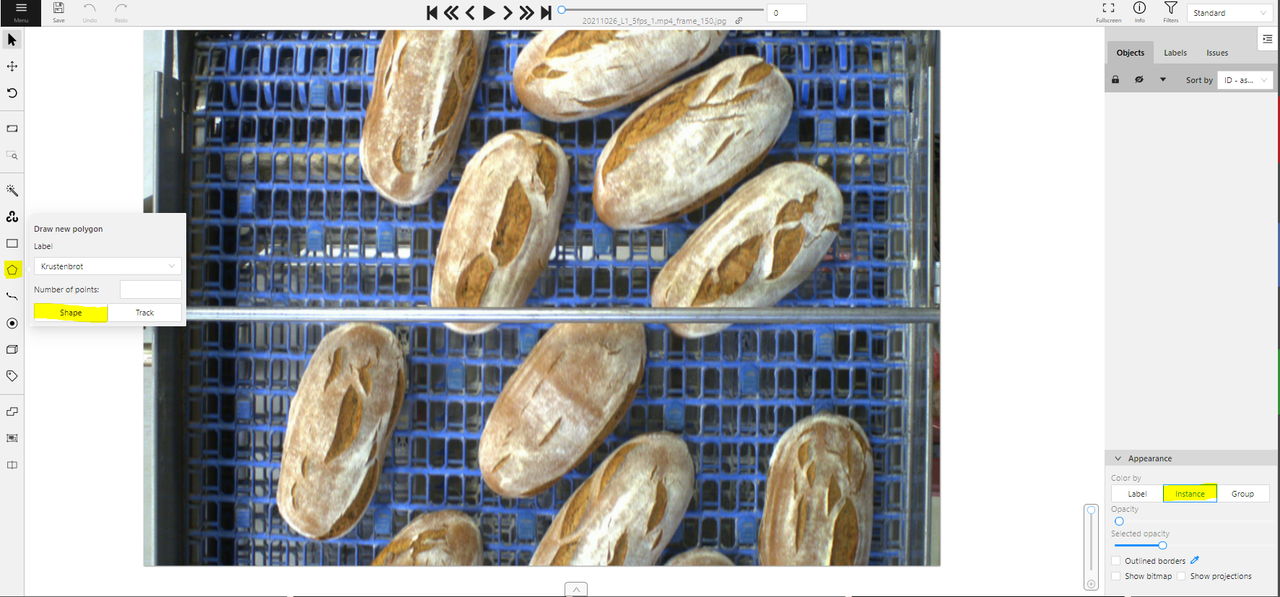
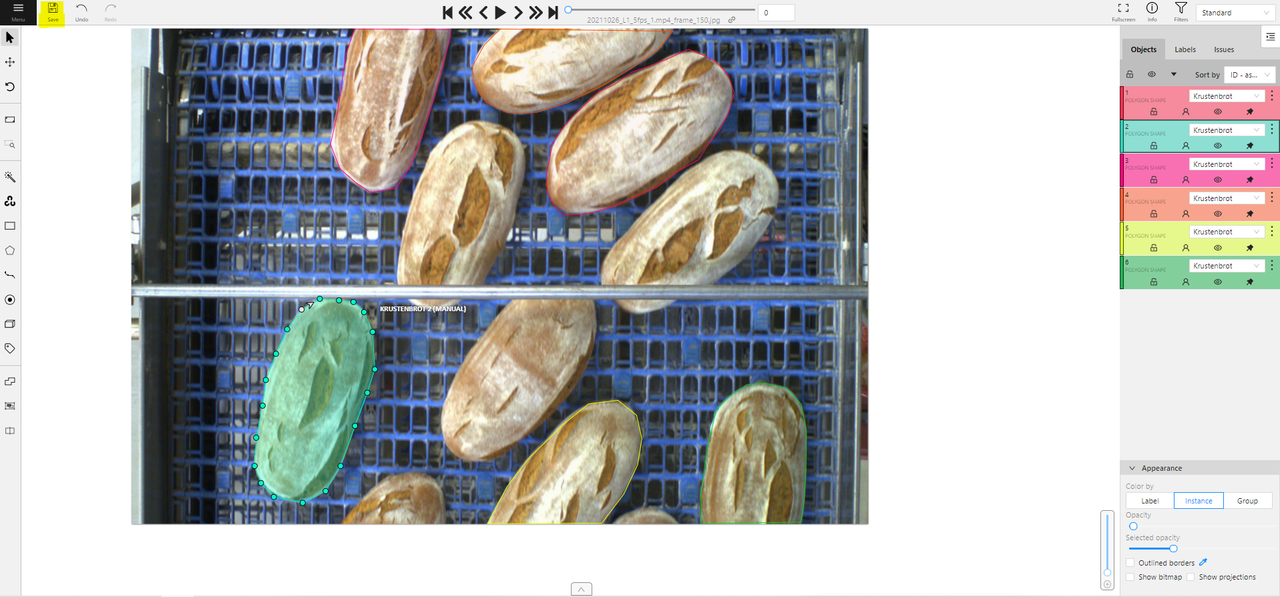
- You can assign label for each instance annotation, as you can see different colors for each instance. In case of semantic segmentation, all the instance will have the same color. Click on Save after every annotation, to save the intermediate annotations. To end the current instance annotation, drag the cursor to the polygon icon on the left vertical panel and click on the icon.
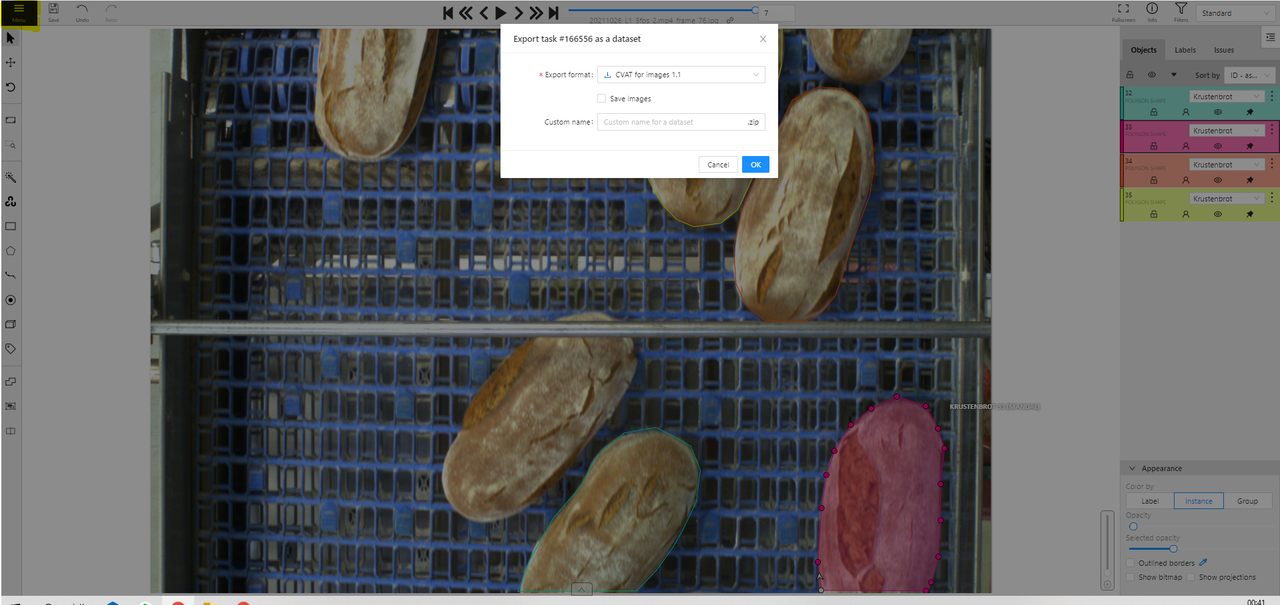
- Export the dataset in the required format.
Hopefully this tutorial was helpful, if you are stuck at any step, please drop a comment below or mail me. Cheers !!!
Written on December 17th, 2021 by Karthik